Cooking pasta in a pressure cooker can revolutionize your meal prep, turning lengthy stovetop sessions into quick, hands-off experiences. Yet, the fear of mushy, overcooked noodles often deters home cooks from embracing this method. As someone with over a decade of experience navigating the intricacies of pressure cookers, from the simplest stovetop models to advanced electric units, I’m here to guide you. This article will equip you with the practical knowledge to consistently achieve perfectly al dente pasta, ensuring every dish is a culinary success and never a sticky, mushy mess.
The Pressure Cooker Pasta Paradox: Why Mushy No More?
Pressure cooking pasta offers undeniable benefits: speed, energy efficiency, and often, a richer flavor as starches release directly into your sauce. However, the enclosed, high-temperature environment also presents unique challenges. Unlike stovetop boiling where you can constantly monitor and taste, pressure cooking is a “set it and forget it” process until the timer goes off. This requires precision in timing and liquid ratios to prevent the pasta from absorbing too much water and breaking down its structure, resulting in that dreaded mushy texture. The key lies in understanding how pasta behaves under pressure and implementing specific techniques to control its hydration and cooking.
Understanding Pressure Cooking and Pasta Science
|
Our Picks for the Best Pressure cooker in 2026
As an Amazon Associate I earn from qualifying purchases.
|
||
| Num | Product | Action |
|---|---|---|
| 1 | Instant Pot Duo 7-in-1 Electric Pressure Cooker, Slow Cooker, Rice Cooker, Steamer, Sauté, Yogurt Maker, Warmer & Sterilizer, Includes App with Over 800 Recipes, Stainless Steel, 8 Quart |

|
| 2 | Our Place Dream Cooker - 6 Qt Ceramic Nonstick Multicooker & Pressure Cooker with Touchscreen Controls & Auto Steam Release - 4 Modes: Pressure Cook, Sauté/Sear, Slow Cook & Warm - Spice |
|
| 3 | Our Place Dream Cooker - 6 Qt Ceramic Nonstick Multicooker & Pressure Cooker with Touchscreen Controls & Auto Steam Release - 4 Modes: Pressure Cook, Sauté/Sear, Slow Cook & Warm - Steam |
|
| 4 | Stove Top 304 Stainless Steel Pressure Cooker, One-hand Easy Handle Lid, 3 PSI Setting, 6 Safety Systems, Dishwasher Safe, Olla de Presion, Works for All Cooktops (8.5 QT) |
|
| 5 | COSORI Pressure Cooker 6QT, Stainless Steel, 9-in-1 Multi Cooker, 12 Safety Features, Ceramic Inner Pot, Rice, Slow Cook, Sous Vide, Saute, 1100W |
|
| 6 | CHEF iQ Smart Pressure Cooker with WiFi and Built-in Scale - Easy-to-Use 10-in-1 Multicooker with 500+ Guided Recipes - Rice Cooker, Slow Cooker, Instant Meals for Foodies - 6 Quart - Family Size |
|
| 7 | Instant Pot Duo 7-in-1 Electric Pressure Cooker, Slow Cooker, Rice, Steamer, Sauté, Yogurt Maker, Warmer & Sterilizer, Includes App With Over 800 Recipes, Stainless Steel, 6 Quart |
|
| 8 | Instant Pot Duo 7-in-1 Mini Electric Pressure Cooker, Slow Rice Cooker, Steamer, Sauté, Yogurt Maker, Warmer & Sterilizer, Includes Free App with over 1900 Recipes, Stainless Steel, 3 Quart |
|
| 9 | COMFEE' 9-in-1 Electric Pressure Cooker, 14 Presets Instant Multi Cooker Olla de Presion Non-Stick Pot Yogurt Maker Rice Cooker Slow Cooker Sauté Steamer 6 Quarts Black |
|
| 10 | Our Place Dream Cooker - 6 Qt Ceramic Nonstick Multicooker & Pressure Cooker with Touchscreen Controls & Auto Steam Release - 4 Modes: Pressure Cook, Sauté/Sear, Slow Cook & Warm - Blue Salt |
|
When pasta cooks, it absorbs water, and its starch granules swell and gelatinize. In a pressure cooker, the boiling point of water is elevated, meaning the pasta cooks at a higher temperature. This accelerated process means pasta can go from perfectly firm to overly soft in a matter of seconds. Additionally, since the cooking liquid is contained, the pasta starches are concentrated within the pot, contributing to a thicker sauce but also demanding careful liquid management.
Common Pitfalls Leading to Overcooked Pasta
Several factors commonly lead to mushy pressure cooker pasta:
- Incorrect cooking time: The most frequent culprit. Traditional stovetop times are far too long.
- Too much liquid: Over-hydrates the pasta, making it soft and sticky.
- Stirring before cooking: Can cause pasta to clump and stick together during the pressure cooking process.
- Improper pressure release: Allowing too much natural release can continue cooking the pasta.
- Using delicate pasta types: Some thin or very small pastas are ill-suited for the intense pressure cooker environment.
The Golden Rules for Al Dente Pressure Cooker Pasta
Achieving that ideal al dente bite requires adhering to a few fundamental principles. These “golden rules” will empower you to tackle any pasta shape with confidence.
Precision in Cooking Time: The Halving Method
The most critical factor is cooking time. A widely accepted starting point for pressure cooker pasta is to take the lowest recommended cooking time on the pasta package, divide it by two, and then subtract one minute for a true al dente result. For example, if a box suggests 10-12 minutes, take 10, halve it to 5, and subtract 1, yielding a 4-minute pressure cook time. If you prefer a slightly softer texture, you can skip the final minute subtraction. This method accounts for the time it takes for the pressure cooker to come to pressure, during which some cooking already occurs.
The Essential Liquid-to-Pasta Ratio
Unlike stovetop cooking where pasta is submerged in a generous amount of boiling water, pressure cooker pasta requires a specific liquid ratio because the liquid is absorbed, not drained. A good general guideline is to use 2 cups of liquid for every 8 ounces (half a pound) of dry pasta. This translates to 4 cups of liquid for a standard 16-ounce (1-pound) box. The liquid can be water, broth, or even diluted pasta sauce, but ensure the pasta is fully submerged to cook evenly. Keep in mind that thick tomato sauces do not count as liquid in the same way water or broth does for pressure build-up.
 Dry pasta and cooking liquid in an open pressure cooker pot.
Choosing Your Pasta Wisely for Pressure Cooking
Not all pasta shapes are created equal when it comes to pressure cooking. Sturdier, shorter cuts tend to fare best. Think penne, rotini, fusilli, farfalle (bowtie), rigatoni, ziti, and elbow macaroni. These shapes hold up well to the pressure and maintain their structure. While long pastas like spaghetti, fettuccine, or linguine can be cooked, it’s often best to break them in half to ensure they fit properly and can be submerged in the liquid. Laying them in a crisscross pattern can also help prevent them from clumping together into a solid mass. Delicate pastas like angel hair or very thin vermicelli are generally not recommended as they can easily become mushy.
The Art of Pressure Release: Quick vs. Natural
The method of pressure release plays a significant role in the final texture of your pasta. For al dente results, a Quick Release (QR) is almost always preferred. This stops the cooking process rapidly by venting the steam immediately after the cooking cycle is complete.
However, some experts suggest a short Natural Release (NR) of 3-5 minutes, followed by a Quick Release, especially for certain pasta shapes or to prevent excess starchy liquid from spraying out of the valve. This brief natural release allows some of the internal pressure to subside, reducing the force of the steam and continuing the cooking process ever so slightly, which can be beneficial for a perfectly tender al dente. After any release, it’s crucial to open the lid and stir the pasta immediately to prevent it from sticking together and to help it absorb any remaining liquid.
Step-by-Step: Cooking Al Dente Pasta with Confidence
Ready to cook? Follow these steps for consistently perfect pressure cooker pasta.
Preparation is Key: Gather Your Ingredients
Before you begin, have your pasta, cooking liquid (water or broth), salt, and a touch of oil ready. Seasoning the cooking liquid is essential for flavorful pasta, as the pasta absorbs the seasoned liquid directly. Adding about a tablespoon of olive oil per pound of pasta can help minimize foaming and preventing sticking.
Loading the Pot: Layering for Success
Place your pasta into the pressure cooker’s inner pot. For short pasta, simply add it evenly. If using long pasta, break it in half and layer it in a crisscross pattern to prevent clumping. Pour your seasoned liquid over the pasta, ensuring it’s mostly submerged. Resist the urge to stir the pasta at this stage; stirring can lead to a starchy, sticky clump.
Setting Your Pressure Cooker: Time and Pressure
Secure the lid on your pressure cooker and set the sealing valve to the “Sealing” position. Select the “Pressure Cook” or “Manual” setting and set it to HIGH pressure. Use the calculated cooking time (half the lowest box time, minus one minute). The cooker will take 5-15 minutes to come to pressure before the actual cooking countdown begins.
The Crucial Release: Unlocking Perfect Texture
Once the cooking time is complete, immediately perform a Quick Release (QR). Carefully turn the pressure release valve to the “Venting” position. If you notice a lot of starchy foam or liquid spraying out, turn the valve back to “Sealing” for 20-30 seconds, then release again. A kitchen towel draped over the valve can help catch any spray.
Post-Cook Care: Stirring and Serving
As soon as the pressure has fully released and the lid unlocks, open the pressure cooker. Give the pasta a good, vigorous stir for about 30 seconds. This action helps separate the noodles, distributes any remaining sauce, and allows the pasta to absorb any final bits of liquid, preventing it from clumping and ensuring an even texture. Your perfectly al dente pasta is now ready to be enjoyed!
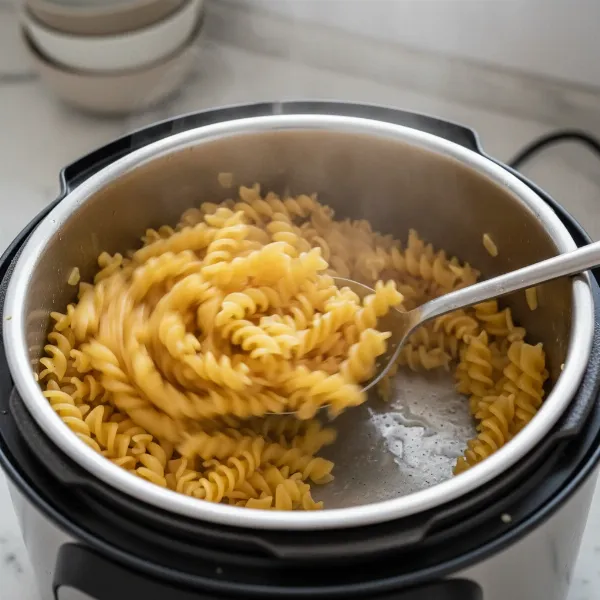 Perfectly cooked al dente pasta being stirred in a pressure cooker pot.
Troubleshooting Your Pressure Cooker Pasta
Even with the best intentions, things can sometimes go awry. Here’s how to address common issues.
My Pasta is Still Mushy: Common Errors and Fixes
If your pasta turned out mushy, the most likely culprits are overcooking or too much liquid.
- Too long a cook time: Reduce the pressure cooking time by another minute next time. Remember that residual heat can continue cooking the pasta after pressure release.
- Not enough quick release: Ensure you perform a quick release immediately, or shorten any natural release phase.
- Excess liquid: Double-check your liquid-to-pasta ratio. If you’re adding sauce, reduce the amount of additional water or broth.
Pasta Sticking Together: Prevention and Solutions
Sticky pasta is often a result of insufficient liquid, too much starch, or not enough immediate stirring after cooking.
- Not enough liquid: Ensure your pasta is completely covered with liquid before cooking.
- No oil: Adding a tablespoon of olive oil can help coat the pasta and reduce sticking.
- No post-cook stir: Always stir the pasta vigorously as soon as you open the lid.
- Stirring pre-cook: Avoid stirring the pasta into the liquid before you seal the pot. Layering helps.
Foaming and Starchy Spray: What to Do
Foaming during pressure release is common with starchy foods like pasta.
- Add oil: A tablespoon of oil before cooking can significantly reduce foaming.
- Gradual release: Instead of a full quick release, gently turn the valve to release pressure slowly, or perform an intermittent quick release (release for 10-15 seconds, close, repeat).
- Cover the valve: Drape a kitchen towel over the steam release valve to contain any spray.
- Don’t overfill: Ensure your pot isn’t filled beyond its maximum fill line.
Quick Reference: Pressure Cooker Pasta Timing Chart
This chart provides general guidelines. Always cross-reference with your pasta package instructions and adjust for your specific pressure cooker model and desired doneness.
| Pasta Type | Box Cook Time Range | Pressure Cook Time (Al Dente) | Liquid Ratio (per 8oz pasta) | Notes |
|---|---|---|---|---|
| Elbow Macaroni | 7-9 minutes | 3-4 minutes | 2 cups | Ideal for mac and cheese |
| Penne, Rigatoni, Ziti | 10-12 minutes | 4-5 minutes | 2 cups | Sturdy, great for sauces |
| Rotini, Fusilli | 8-10 minutes | 3-4 minutes | 2 cups | Holds sauces well |
| Farfalle (Bowtie) | 11-13 minutes | 5 minutes | 2 cups | Distinct shape, good for salads |
| Spaghetti, Linguine | 9-11 minutes | 4-5 minutes | 2 cups | Break in half, layer crisscross to prevent clumping |
| Whole Wheat Pasta | Varies | Box time / 2 – 1 min | 2 cups | May need slightly more liquid, follow formula |
| Gluten-Free Pasta | Varies | Box time / 2 – 1 min or 0 min | 2 cups | Monitor closely, some benefit from a “0 minute” cook |
Delicious One-Pot Pressure Cooker Pasta Recipes
One of the greatest joys of pressure cooking pasta is creating delicious, complete meals in a single pot.
Speedy Weeknight Mac and Cheese
Combine 1 lb elbow macaroni, 4 cups water or broth, 1 tsp salt, and 1 tbsp butter in your pressure cooker. Cook on HIGH pressure for 3 minutes, then perform a Quick Release. Open the lid, stir in 1 cup milk, 1/2 cup cream cheese, and 2 cups shredded cheddar cheese until melted and creamy. Serve immediately.
Zesty Tomato and Basil Penne
Add 1 lb penne, one 28-oz can crushed tomatoes, 1.5 cups vegetable broth, 2 cloves minced garlic, 1 tsp dried basil, 1/2 tsp salt, and 1 tbsp olive oil to the pot. Do not stir. Cook on HIGH pressure for 5 minutes, followed by a Quick Release. Stir in fresh basil and Parmesan cheese before serving.
Hearty Chicken and Broccoli Rotini
Sauté 1 lb diced chicken breast in olive oil using the Sauté function until lightly browned. Add 1 lb rotini pasta, 3.5 cups chicken broth, 1 tsp garlic powder, 1/2 tsp onion powder, and salt and pepper to taste. Do not stir. Cook on HIGH pressure for 4 minutes, then Quick Release. Stir in 2 cups chopped fresh broccoli florets and let sit for 5 minutes to steam in the residual heat before serving.
Conclusion
Cooking pasta in a pressure cooker is not just a convenience; it’s a culinary technique that, when mastered, can consistently deliver perfectly al dente results. By understanding the critical balance of cooking time, liquid ratios, and the art of pressure release, you can banish mushy pasta from your kitchen for good. Embrace these methods, experiment with your favorite pasta shapes, and unlock a world of quick, flavorful, one-pot meals. What delicious pressure cooker pasta creation will you try first?
Frequently Asked Questions
Can I cook long pasta like spaghetti in a pressure cooker without breaking it?
While possible, it’s generally recommended to break long pasta like spaghetti in half to ensure it fits and is fully submerged in the liquid, which prevents uneven cooking and clumping. Some techniques involve arranging it in a crisscross pattern without breaking, but this can be less consistent.
How does the type of liquid affect the pasta?
The type of liquid significantly impacts flavor. Water is neutral, while chicken or vegetable broth adds depth. Cooking pasta directly in diluted sauces allows the pasta to absorb those flavors, resulting in a more integrated and delicious one-pot meal.
Is it truly faster than stovetop cooking?
Yes, it is often faster, especially for larger quantities. While the pressure cooker takes time to come to pressure, the actual cooking time for the pasta is drastically reduced, and you save time by not having to wait for a large pot of water to boil, drain, or clean multiple pots.
Can I make gluten-free pasta in a pressure cooker?
Absolutely! The pressure cooker method works very well for gluten-free pasta. The same general formula of halving the lowest box cooking time and potentially subtracting a minute applies. Some gluten-free varieties might even benefit from a “0 minute” pressure cook time with a quick release to prevent overcooking.
What if I want a softer pasta?
If you prefer your pasta softer than al dente, simply add one minute to the calculated pressure cooking time. For example, if your al dente time is 4 minutes, try 5 minutes for a slightly more tender result. Always use a quick release to halt cooking quickly once the desired tenderness is reached.